The Ultimate Homemade Apple Pie Recipe: A Guide to Flaky Crusts & Delicious Fillings

There’s a reason apple pie holds a special place in the hearts (and stomachs) of many. This iconic dessert, with its comforting aroma and warm, spiced filling encased in a golden, flaky crust, evokes feelings of nostalgia and home. While it’s truly delightful at any time of year, a homemade apple pie truly shines as a centerpiece for fall gatherings or a cozy evening treat. This recipe promises a perfectly balanced flavor and an irresistible texture that will have everyone asking for a second slice.
The Irresistible Allure of Homemade Apple Pie
Few desserts can rival the comfort and joy delivered by a slice of warm, homemade apple pie. Beyond just a simple dessert, it’s a symbol of hospitality, tradition, and the changing seasons. The process of baking it, from rolling out the buttery crust to peeling and slicing the fresh apples, is a delightful experience that fills your home with an intoxicating fragrance. And the reward? A perfectly balanced sweet-tart filling, tender apples, and a crust that shatters with every bite. Once you master this classic, you’ll understand why it’s a timeless favorite.
For me, pastries have always been a delightful weakness. Fortunately, my house often buzzes with hungry teenagers who are more than happy to help devour this delicious pie, saving me from the tempting battle against a second (or third) slice. This recipe simplifies the process, especially when you use a reliable pie crust. We recommend our bulk pie crust recipe, which yields six crusts, perfect for freezing. I simply take two crusts out in the morning, and by the afternoon, they’re thawed and ready to be transformed into this magnificent pie. While this recipe highlights apples, it’s versatile enough for other fresh fruits. Just remember to adjust or omit the cinnamon if you’re using fruits that don’t traditionally pair well with it.
Choosing the Perfect Apples for Your Pie
The secret to a truly outstanding apple pie lies in the apples themselves. While many varieties can work, selecting the right combination is key to achieving that ideal balance of flavor and texture. You want apples that hold their shape well during baking, offering a pleasant bite rather than turning into mush. A mix of tart and sweet varieties often yields the most complex and satisfying flavor profile.
- Granny Smith: These are the classic choice for a reason. Their firm texture and tartness provide a wonderful contrast to the sweet sugar in the filling, ensuring your pie isn’t overly sweet. They hold their shape beautifully.
- Honeycrisp: Known for their crisp texture and balanced sweet-tart flavor, Honeycrisp apples are excellent in pies, adding a delightful juiciness.
- Braeburn: With a spicy-sweet flavor and firm texture, Braeburns are another fantastic option that bakes well.
- Fuji: Sweet and crisp, Fujis add a lovely sweetness, but might need to be balanced with a tarter apple.
- Golden Delicious: These apples become soft and tender when baked, offering a sweeter base. They pair well with firmer, tarter apples.
For this recipe, we specifically call for Granny Smith apples to ensure a consistent, delightful tartness that balances the sugar and cinnamon. However, don’t hesitate to experiment with a combination of 2-3 of your favorite baking apples for a unique twist!
Mastering the Flaky Pie Crust: Foundation of a Great Pie
A truly spectacular apple pie begins with a remarkable crust. Achieving that golden, flaky, and tender texture might seem daunting, but with a few simple techniques, it’s entirely achievable. Our bulk pie crust recipe is a fantastic starting point, designed for ease and reliability, allowing you to have perfect crusts ready in your freezer. If you’re using our bulk recipe, simply pull out two crusts in the morning to thaw. By the time you’re ready to bake, they’ll be perfectly pliable.
The key principles for a consistently flaky crust are:
- Cold Ingredients: Keep your butter and water as cold as possible. This prevents the butter from melting prematurely, allowing it to create steam pockets in the oven that result in flakiness.
- Minimal Handling: Overworking the dough develops the gluten, leading to a tough crust. Handle it just enough to bring it together.
- Chilling: Chilling the dough after mixing and again after shaping helps the butter solidify and the gluten relax, contributing to a tender texture.
- Parchment Paper for Rolling: As detailed in the instructions, rolling the dough between two pieces of lightly floured parchment paper is a game-changer. It prevents sticking, eliminates the need for excessive flour (which can dry out the crust), and makes transferring the delicate dough to the pie pan incredibly easy.
Following these steps will ensure your crust is the perfect vessel for your delicious apple filling.
Recipe

Classic Homemade Apple Pie
Add to Shopping ListGo to Shopping List
Ingredients
- 2 uncooked pie crusts
- 7 Granny Smith apples
- ¾ cup sugar, plus 1-2 Tbsp. more for sprinkling
- 2 Tbsp. all-purpose flour
- ¾ tsp. ground cinnamon
- 4 Tbsp. cold butter
- 1 large egg
- 1 Tbsp. cold water
Instructions
-
Preheat your oven to 425°F (220°C). Ensuring your oven is fully preheated before placing the pie in is crucial for a perfectly crisp crust and even baking.
-
Prepare your pie crusts. If using frozen, allow them to thaw completely. To roll them out, place one piece of parchment paper on your counter and lightly sprinkle it with flour. Position your pie crust dough in the center, and lightly dust the top with flour. Cover with a second piece of parchment paper. Begin rolling from the center, working your way outwards in all directions until the dough is evenly flattened. Periodically lift the top piece of parchment paper and reposition it to prevent it from tearing or sticking to the dough.
-
Roll each crust into a circle large enough to fit your pie pan. Make sure the bottom crust is slightly larger than the top crust, allowing it to cover the sides of the pie pan and provide enough overhang to seal with the top crust.
-
Carefully transfer the larger bottom crust into your pie pan. Gently press it into place, ensuring there are no air bubbles trapped between the crust and the pan. This helps prevent a soggy bottom.
-
In a medium bowl, combine the ¾ cup of granulated sugar with the all-purpose flour and ground cinnamon. Mix these dry ingredients thoroughly to ensure the cinnamon is evenly distributed and the flour will properly thicken the apple juices.
-
Core, peel, and then thinly slice your Granny Smith apples. Aim for consistent slice thickness to ensure even cooking. Place the sliced apples in a large mixing bowl.
-
Sprinkle the prepared sugar mixture over the sliced apples. Gently toss and mix the apples until all pieces are evenly coated with the sugar and spice mixture. This ensures every bite of your pie is flavorful.
-
Arrange the seasoned apples evenly in the bottom pie crust. Dot the top of the apple filling with the 4 tablespoons of cold butter, cut into small pieces. The butter will melt and create a rich, delicious sauce within the pie.
-
Carefully place the second, smaller pie crust over the apple filling. Trim any excess dough from both the top and bottom crusts, leaving about a ½-inch overhang. Pinch or crimp the edges firmly to seal the top and bottom crusts together, preventing the filling from bubbling out during baking.
-
Using a sharp knife, create several small slits or decorative vents in the top pie crust. These openings are crucial for allowing steam to escape while the pie bakes, which prevents the crust from becoming soggy and the pie from bursting.
-
In a small bowl, beat the large egg with 1 tablespoon of cold water to create an egg wash. Use a pastry brush to lightly brush this wash evenly over the entire top crust. This egg wash will give your pie a beautiful golden-brown color and a lovely sheen.
-
For an extra hint of sweetness and a sparkling finish, sprinkle the top of the pie with an additional 1-2 tablespoons of granulated sugar.
-
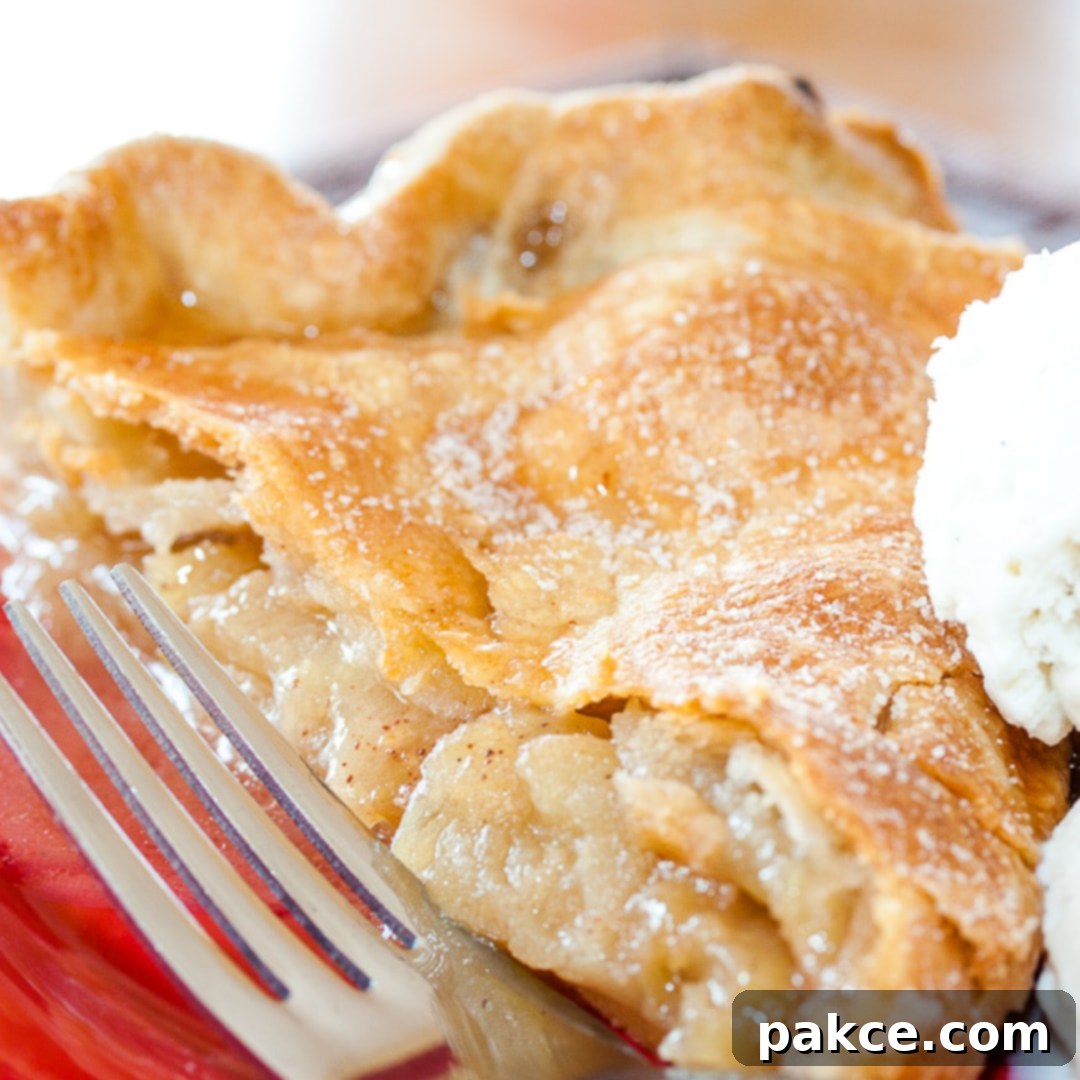
Place the pie on a baking sheet (to catch any potential drips) and bake for approximately 40 minutes, or until the crust is deeply golden brown and the apple filling is visibly bubbling through the vents. This bubbling indicates the filling has thickened properly.
-
Keep an eye on the pie during baking. If the edges of the crust start to brown too quickly before the rest of the pie is done, cover them loosely with strips of aluminum foil. This will protect the edges from burning while allowing the rest of the pie to finish baking to perfection.
Recipe Notes & Tips
Nutrition Information per Serving
Share
Pin
Preventing a Soggy Bottom Crust: Key to Pie Perfection
One of the most common challenges in pie baking is achieving a perfectly crisp bottom crust. No one wants a soggy pie! Fortunately, there are several effective strategies you can employ to ensure your homemade apple pie boasts a beautifully cooked base:
- Blind Baking (Pre-Baking) the Crust: For extra insurance, you can partially blind bake your bottom crust before adding the filling. This involves lining the raw crust with parchment paper, filling it with pie weights or dried beans, and baking it for 10-15 minutes until lightly golden. This creates a barrier against the moisture from the apples.
- Hot Baking Surface: Place your pie on a preheated baking sheet or pizza stone in the oven. The direct heat from the hot surface helps to quickly cook the bottom crust, preventing it from becoming saturated.
- Proper Apple Preparation: Ensure your apples are sliced evenly and not too thick. Overly thick slices can release more moisture. Tossing them with flour (as in this recipe) helps absorb excess liquid.
- Egg Wash on Bottom Crust (Optional): A very light brush of egg white or an egg wash on the bottom crust before adding the filling can create a seal that helps protect it from moisture.
- Good Ventilation: As mentioned in the instructions, creating slits in the top crust is vital. These vents allow steam to escape from the filling, which prevents the crust from becoming overly moist.
Serving Suggestions for Your Delicious Apple Pie
While a slice of homemade apple pie is exquisite on its own, certain accompaniments can elevate the experience to new heights. Here are a few popular and delightful serving suggestions:
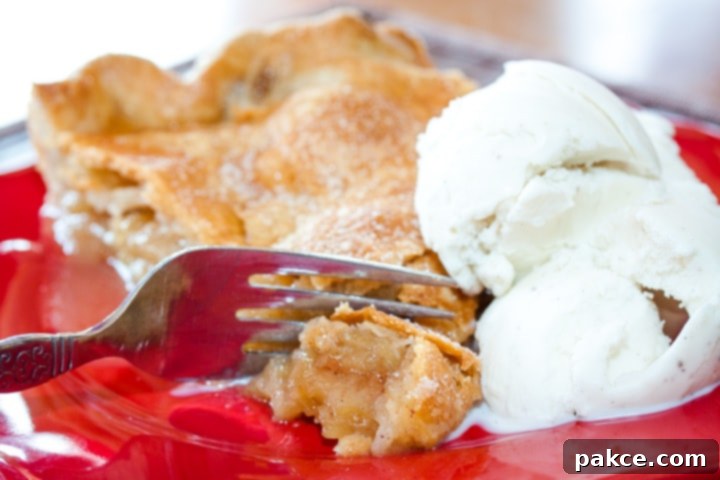
- Vanilla Bean Ice Cream: The quintessential pairing! The cold, creamy sweetness of vanilla ice cream melts slightly into the warm, spiced apple filling, creating a harmonious blend of temperatures and flavors.
- Sharp Cheddar Cheese: A surprisingly delicious and traditional pairing, especially in some regions. The salty, tangy notes of sharp cheddar cheese beautifully cut through the sweetness of the apple pie, offering a sophisticated contrast.
- Freshly Whipped Cream: A dollop of lightly sweetened whipped cream adds a delicate richness and airiness that complements the dense filling without overpowering it.
- Caramel Sauce Drizzle: For those with a sweet tooth, a generous drizzle of homemade or store-bought caramel sauce adds another layer of decadent sweetness and a slightly chewy texture.
- A Warm Beverage: Serve your pie alongside a hot cup of coffee, cider, or spiced tea for the ultimate cozy comfort.
Storing and Reheating Your Homemade Apple Pie
If by some miracle you have leftover apple pie, proper storage will ensure it remains delicious for days. Here’s how to keep your pie fresh and how to reheat it for that freshly baked taste:
- Room Temperature: A freshly baked apple pie can be stored at room temperature for up to 2 days, loosely covered with foil or plastic wrap. This is generally preferred for pie with fruit fillings, as refrigeration can sometimes dull the flavors and alter the crust’s texture.
- Refrigeration: For longer storage, or if your home is particularly warm, you can refrigerate the pie for up to 4-5 days. Wrap it tightly in plastic wrap or aluminum foil to prevent it from drying out or absorbing odors from the fridge.
- Freezing: Baked apple pie freezes wonderfully! Allow the pie to cool completely, then wrap it tightly in several layers of plastic wrap and then foil. It can be frozen for up to 3-4 months. Thaw overnight in the refrigerator before reheating.
- Reheating: To reheat a whole pie, place it in a preheated oven at 300-325°F (150-160°C) for 20-30 minutes, or until warmed through. For individual slices, you can reheat them in a toaster oven or microwave, but for the best crust texture, a conventional oven is recommended.
Frequently Asked Questions (FAQ) About Apple Pie
- Q: What kind of apples are best for apple pie?
A: A mix of tart and firm apples like Granny Smith, Honeycrisp, Braeburn, or Fuji works best. Granny Smiths are a classic choice for their tartness and ability to hold their shape during baking. - Q: How do I prevent a soggy bottom crust?
A: Ensure your oven is fully preheated, consider blind baking the bottom crust, use a hot baking sheet or pizza stone, and make sure to cut slits in the top crust for steam to escape. Coating the apples lightly with flour also helps absorb excess moisture. - Q: Can I make apple pie ahead of time?
A: Yes, you can assemble the pie up to a day in advance and store it in the refrigerator before baking. Alternatively, you can bake it completely and store it at room temperature for up to 2 days, or freeze it for longer periods. - Q: How do I know when my apple pie is fully baked?
A: The crust should be a rich golden brown, and you should see the filling bubbling through the vents in the top crust. If you gently insert a knife or skewer through a vent, the apples should feel tender. - Q: Can I use different spices?
A: Absolutely! While cinnamon is traditional, you can add a pinch of nutmeg, allspice, cloves, or ginger for a different flavor profile. Adjust to your personal preference.
Baking a homemade apple pie is a truly rewarding experience, transforming simple ingredients into a masterpiece of comfort. Whether you’re a seasoned baker or trying your hand at pie for the first time, this detailed guide and recipe will help you create an unforgettable dessert. So go ahead, embrace the joy of baking, and fill your home with the inviting aroma of a freshly baked apple pie.
Pin this recipe:

