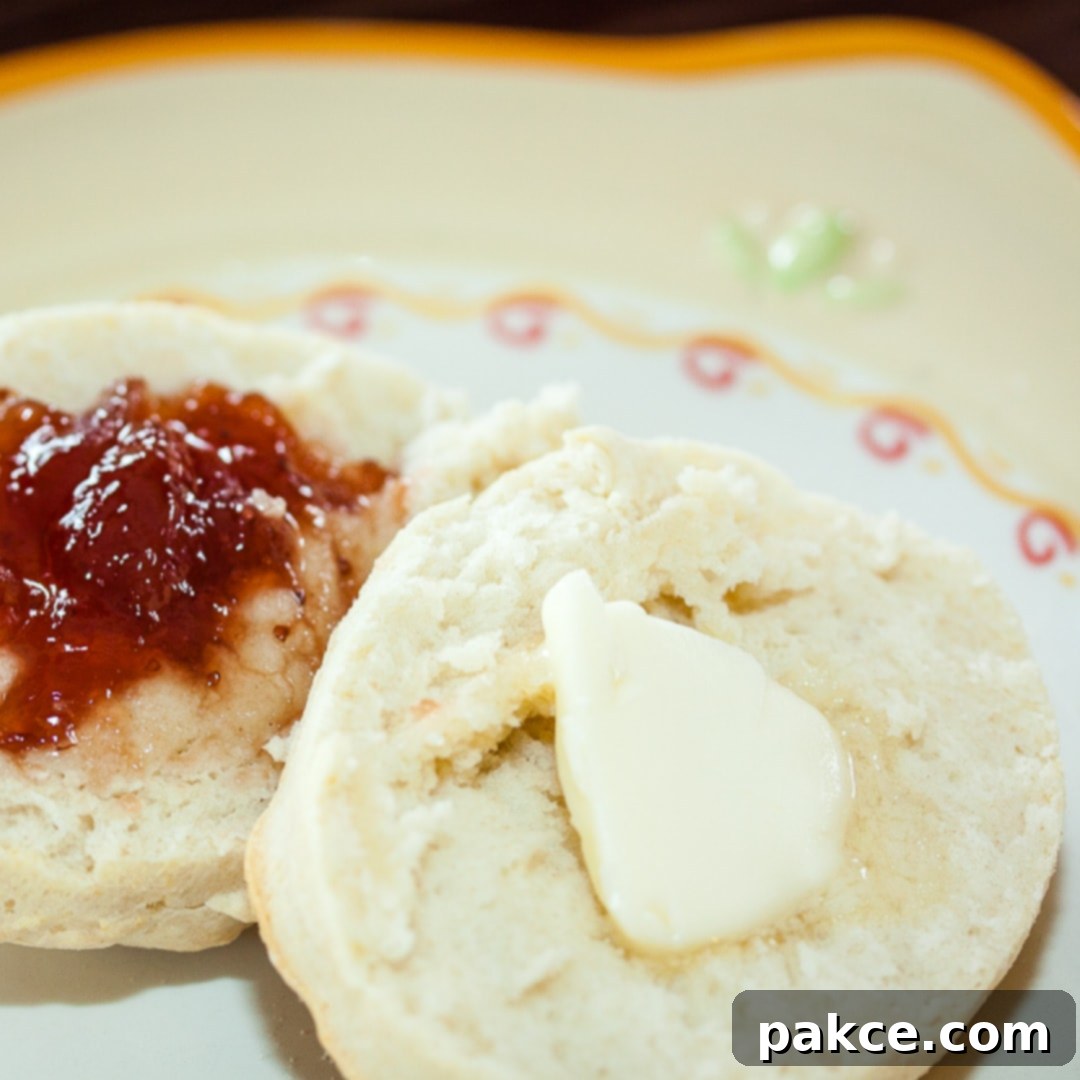
The Ultimate 3-Ingredient Buttermilk Biscuits: Fluffy, Easy, and Freezer-Friendly
Imagine warm, fluffy biscuits, golden-brown and ready to melt in your mouth, with just three simple ingredients. This isn’t a dream; it’s the magic of these incredible buttermilk biscuits! Passed down through generations, this recipe is a testament to how uncomplicated truly delicious baking can be. Whether you’re a seasoned baker or just starting your culinary journey, you’ll be amazed at the consistent, perfect results. Plus, we’re making a generous batch, so you can enjoy some fresh from the oven and freeze the rest for quick breakfasts or impromptu meals.
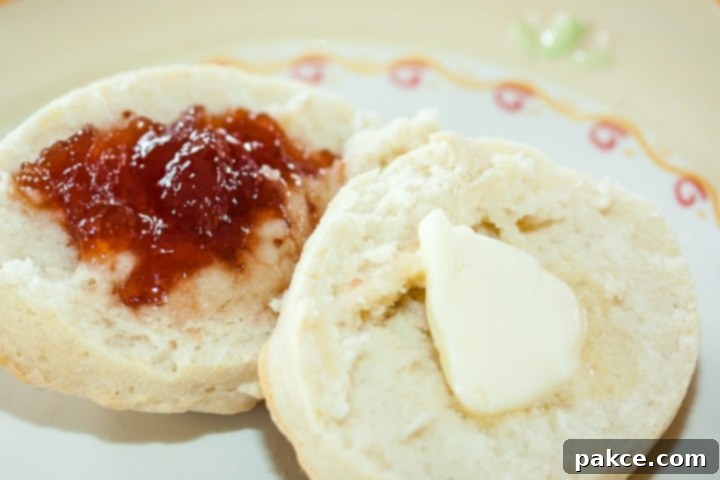
Table of Contents
- The Magic of 3 Ingredients
- Crafting the Perfect Buttermilk Biscuit Dough
- Buttermilk vs. Soured Milk: The Crucial Difference
- Rolling and Cutting for Fluffy Biscuits
- The Essential Tool: A Biscuit Cutter
- Baking Your Golden Biscuits
- Freezing Buttermilk Biscuits for Convenience
- Serving Suggestions and Variations
- Recipe
The Magic of 3 Ingredients
This cherished recipe, a staple in my family for generations, simplifies biscuit-making without compromising on flavor or texture. The beauty lies in its minimalist approach: self-rising flour, butter, and real buttermilk. These three ingredients combine to create biscuits that are incredibly tender, flaky, and rich. Not only is this recipe fantastic for classic biscuits, but the versatile dough can also be transformed into other delightful treats. For instance, spread the rolled dough with melted butter, a sprinkle of cinnamon, and sugar, then roll, slice, and bake for effortless, homemade cinnamon rolls.
One of the best aspects of this recipe is its generous yield. It makes a large batch, perfect for feeding a crowd or for meal prepping. You have the flexibility to freeze half of the biscuits either before or after baking. Freezing uncooked biscuits is a fantastic way to ensure you always have fresh, hot biscuits ready for breakfast with minimal effort. Alternatively, if you bake them first, you can create your own freezer-friendly breakfast sandwiches, far superior to store-bought options.
Crafting the Perfect Buttermilk Biscuit Dough
The journey to perfect biscuits begins with properly combining the flour and butter. For the best results, start with cold butter, cut into small pieces. This is crucial for creating those coveted flaky layers. As the butter melts during baking, it releases steam, separating the layers of dough. If your butter is too warm, it will incorporate too thoroughly into the flour, resulting in a dense biscuit rather than a light and airy one.
Combine the self-rising flour and cold butter using a sturdy stand mixer fitted with dough paddles (a Bosch Universal is excellent for this), a pastry cutter, or even a good old-fashioned fork if you don’t have specialized tools. The goal is to cut the butter into the flour until the mixture resembles coarse cornmeal with pea-sized pieces of butter still visible. This texture is key to achieving flakiness. Avoid overworking the mixture at this stage; gentle handling ensures tenderness.
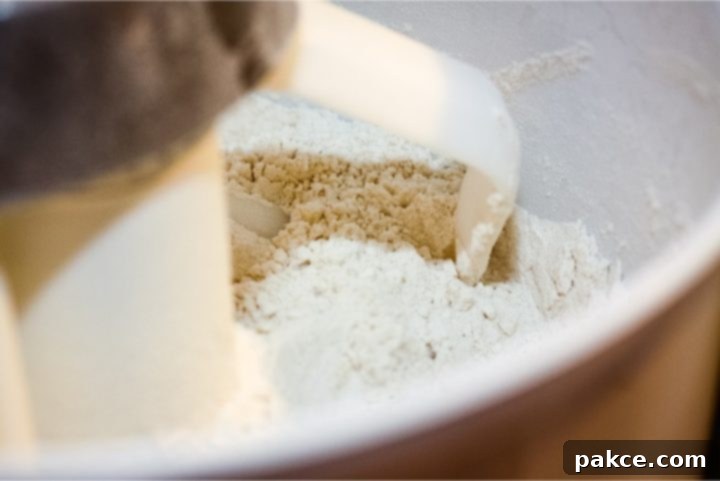
Once your flour and butter mixture achieves a crumbly, even consistency, it’s time to introduce the star ingredient: buttermilk. This is where the magic truly happens, contributing to the distinct tang and tender texture of the biscuits.
Buttermilk vs. Soured Milk: The Crucial Difference
Before adding the buttermilk, let’s address a common question: can you substitute soured milk for buttermilk? While many online resources suggest mixing milk with lemon juice or vinegar to create “soured milk” as a buttermilk substitute, for this classic buttermilk biscuit recipe, it is **strongly advised against**. The unique flavor and texture of these biscuits rely heavily on authentic cultured buttermilk.
Historically, buttermilk was the liquid left over after churning butter from cream. However, what we buy in grocery stores today is typically cultured buttermilk, which is regular milk fermented with lactic acid bacteria. This process gives cultured buttermilk its signature tangy flavor and thicker consistency. The lactic acid in real buttermilk reacts with the leavening agents in self-rising flour, creating carbon dioxide bubbles that make the biscuits rise beautifully and develop their tender, flaky structure. A simple soured milk substitute cannot replicate these precise chemical reactions or the depth of flavor.
Don’t be too quick to discard buttermilk if it’s slightly past its “best by” date. Due to its high lactic acid content, buttermilk often remains good for a while beyond this date (which is a quality indicator, not an expiration date). Always give it a quick check: shake it, pour a small amount to observe its consistency (it should be smooth, not lumpy), and perform a smell test. You’ll easily discern if it’s still fresh enough for baking.
Rolling and Cutting for Fluffy Biscuits
With the real buttermilk added, it’s time for the final mix. The dough should come together, pulling away from the sides of the mixing bowl easily. You’re looking for a consistency that is cohesive but not overly sticky. If the dough seems too wet, add a little more self-rising flour, a tablespoon at a time. If it’s too dry and crumbly, gradually add a touch more buttermilk until it reaches the desired texture. The photo below illustrates the ideal consistency – well-mixed but still slightly shaggy, indicating tenderness. Avoid overmixing once the buttermilk is added, as this can develop the gluten too much, leading to tough biscuits.
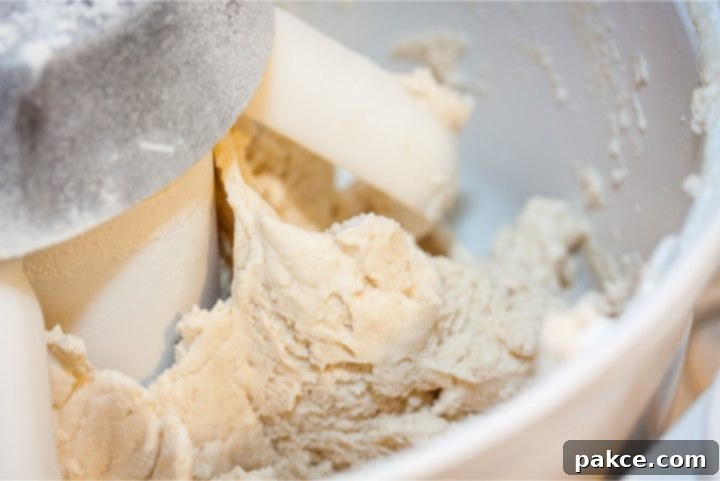
Once the dough reaches rolling consistency, gently knead it a few times with your hands—just enough to bring it together, but not so much that it becomes tough. Turn the dough out onto a lightly floured surface. For rolling, a silicone rolling mat is incredibly helpful as it prevents sticking and has measurement guides. A heavy marble rolling pin is also a game-changer; its weight effortlessly helps achieve a nice, consistent thickness without requiring too much pressure, which can compact the dough.
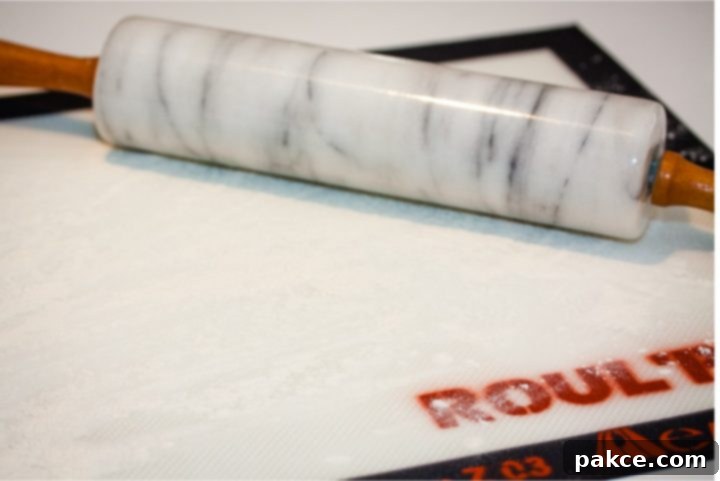
Roll the dough to your desired thickness; I typically aim for about ¾ to 1 inch. This thickness contributes to a good rise and a satisfying, fluffy biscuit. Once rolled, it’s time to cut out your biscuits.
The Essential Tool: A Biscuit Cutter
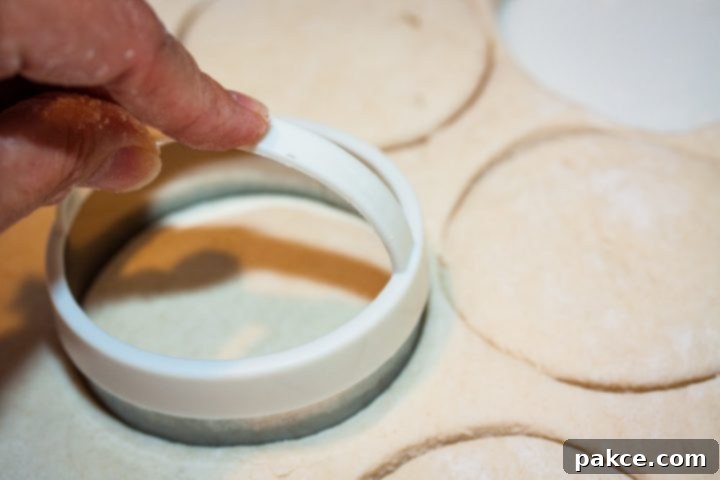
Many home bakers wonder if a drinking glass or a small bowl can be used as a substitute for a biscuit cutter. While it might seem convenient, it’s highly recommended to use a proper biscuit cutter with a sharp, thin edge. The sharp edge of a biscuit cutter cleanly slices through the dough, allowing the biscuits to rise properly and achieve that beautiful, flaky texture. A dull edge, like that of a glass, tends to seal the edges of the dough, which can hinder the rise and result in flat, dense biscuits.
When cutting, press straight down without twisting the cutter. Twisting can seal the edges and prevent the biscuits from rising tall. Cut as many biscuits as possible from the first roll. Gather any leftover dough scraps, gently combine them, and re-roll once or twice more to cut additional biscuits. Try to handle the dough as little as possible and avoid incorporating excessive extra flour during re-rolling, as this can make the subsequent biscuits tougher.
Baking Your Golden Biscuits
Arrange your freshly cut biscuits on a cookie sheet. For best results, place them fairly close together, almost touching. This helps them rise taller and stay moist. Bake them in a preheated oven at a high temperature of 475°F (245°C) until they are beautifully golden brown on top and bottom, which typically takes about 15 minutes. The exact cooking time will vary depending on your oven and the thickness of your biscuits, so keep an eye on them towards the end of the baking cycle. The high heat creates an initial burst of steam, contributing to their impressive rise and tender interior.
Freezing Buttermilk Biscuits for Convenience
One of the greatest benefits of this recipe is its freezer-friendly nature, allowing you to enjoy homemade biscuits any day of the week. You can freeze these delicious buttermilk biscuits either cooked or uncooked, depending on your preference for future use.
To freeze uncooked biscuits: After cutting them, place the raw biscuits in a single layer on a parchment-lined cookie sheet or other flat pan. Place this pan in the freezer for a few hours, or until the biscuits are completely solid. Once frozen, transfer the solid biscuits into a dated freezer-safe container or a heavy-duty freezer bag. This flash-freezing method prevents them from sticking together, allowing you to grab just a few as needed. They can be stored for up to 2-3 months.
To freeze cooked biscuits: Bake the biscuits according to the instructions, then let them cool completely on a wire rack. Once cooled, place them in a dated freezer-safe container or freezer bag. Ensure they are well-sealed to prevent freezer burn. Cooked biscuits will stay fresh in the freezer for about 1 month.
For freezer breakfast sandwiches: If you’re planning to make breakfast sandwiches, fully cook the biscuits and let them cool. Slice the cooked biscuits in half, fill them with your desired ingredients (e.g., egg, cheese, sausage), and wrap each completed sandwich tightly with freezer wrap or aluminum foil. Store these in a freezer container or bag for a quick grab-and-go breakfast option.
How to Cook Frozen Biscuits
Cooking thawed biscuits: If you’ve opted to thaw your raw frozen biscuits (e.g., overnight in the refrigerator), simply follow the normal baking instructions provided in the recipe card.
Cooking frozen raw biscuits: For a true freezer-to-oven experience, place the frozen raw biscuits directly on a cookie sheet. Increase the baking time to approximately 25 minutes at 475°F (245°C). Again, cooking time will vary with biscuit thickness and your oven, so monitor for golden-brown color and doneness.
Reheating cooked biscuits: To reheat previously baked and frozen biscuits, place them on a baking sheet and bake at 350°F (175°C) for about 20-25 minutes, or until heated through. If they start to brown too much, you can lightly tent them with foil for the remaining cooking time to prevent over-browning.
Reheating breakfast sandwiches: For frozen breakfast sandwiches, remove the freezer wrap. Wrap the sandwich loosely in a paper towel and microwave for 2 minutes. Flip the sandwich over and heat for an additional 1-2 minutes, or until thoroughly heated. Alternatively, you can reheat them in a toaster oven or conventional oven (unwrapped or lightly foiled) until warm.
Serving Suggestions and Variations
These versatile buttermilk biscuits are a perfect accompaniment to almost any meal. Serve them warm with a generous smear of butter and your favorite fruit preserves or honey for a classic breakfast. They are also heavenly with creamy sausage gravy, making for a truly indulgent Southern-style meal. Pair them with fried chicken, chili, or a hearty stew for a comforting dinner. For a savory twist, consider adding shredded cheddar cheese and a pinch of chives or garlic powder to the dough before rolling. You can also brush the tops with melted butter just before baking for an extra golden crust.
No matter how you choose to enjoy them, these easy 3-ingredient buttermilk biscuits are sure to become a beloved recipe in your household, offering warmth, comfort, and deliciousness with every bite.
Recipe
Easy Buttermilk Biscuits
Mary Ann
Go to Collections
Add to Shopping List
Go to Shopping List
25
minutes
15
minutes
40
minutes
Bread, Breakfast
American, Vegetarian
20
biscuits
135
Ingredients
-
4
cups
self-rising flour -
½
cup
butter,
softened -
1-½
cups
buttermilk
Prevent your screen from going dark
Instructions
-
Combine flour and butter, cutting with a fork or using a mixer until crumbly.
-
Stir in buttermilk and mix just until combined. Add more flour if too wet, more buttermilk if too dry.
-
When dough is rolling consistency, knead a few times with hands and turn out onto a floured surface. Roll out and cut with a sharp biscuit cutter (do not twist).
-
Bake the biscuits on a cookie sheet at 475°F (245°C) until golden brown, about 15 minutes (time will vary based on thickness).
Notes
Freezing Buttermilk Biscuits
You can freeze the biscuits either cooked or uncooked.
To freeze uncooked: Place the biscuits in a single layer on a cookie sheet or other flat pan and put in the freezer for a few hours or until frozen solid. When frozen, transfer the biscuits into a dated freezer container or bag for later use (up to 2-3 months).
To freeze cooked biscuits: Allow biscuits to cool completely. Place them into a dated freezer container or bag for later use (up to 1 month).
If assembling breakfast sandwiches for the freezer: Slice cooked biscuits and fill as desired. Wrap each biscuit with freezer wrap and place biscuits in a freezer container.
To cook frozen biscuits:
If cooking thawed (raw) biscuits, follow normal cooking instructions.
To cook frozen (raw) biscuits, extend cooking time to about 25 minutes at 475°F (245°C) (cooking time will vary with thickness).
If reheating cooked biscuits, bake at 350ºF (175°C) for about 20-25 minutes or until hot. If biscuits begin to brown too much, cover with foil for remaining cooking time.
To reheat breakfast sandwiches, wrap breakfast sandwich in a paper towel and heat in microwave for 2 minutes, then flip over and heat for an additional 1-2 minutes until heated through.
Nutrition per serving
Serving:
1
biscuit
Calories:
135
cal
Carbohydrates:
18
g
Protein:
3
g
Fat:
5
g
Sodium:
47
mg
Fiber:
1
g
Sugar:
1
g
Share
Pin
