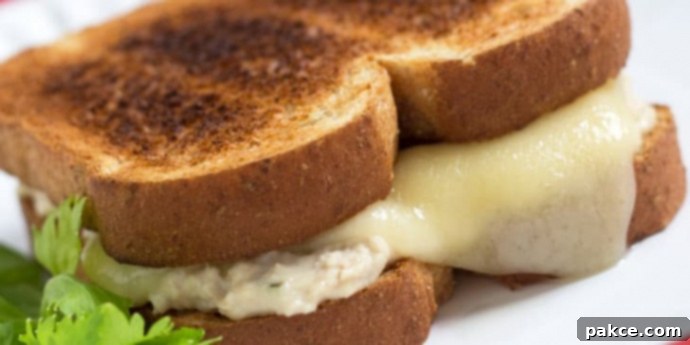
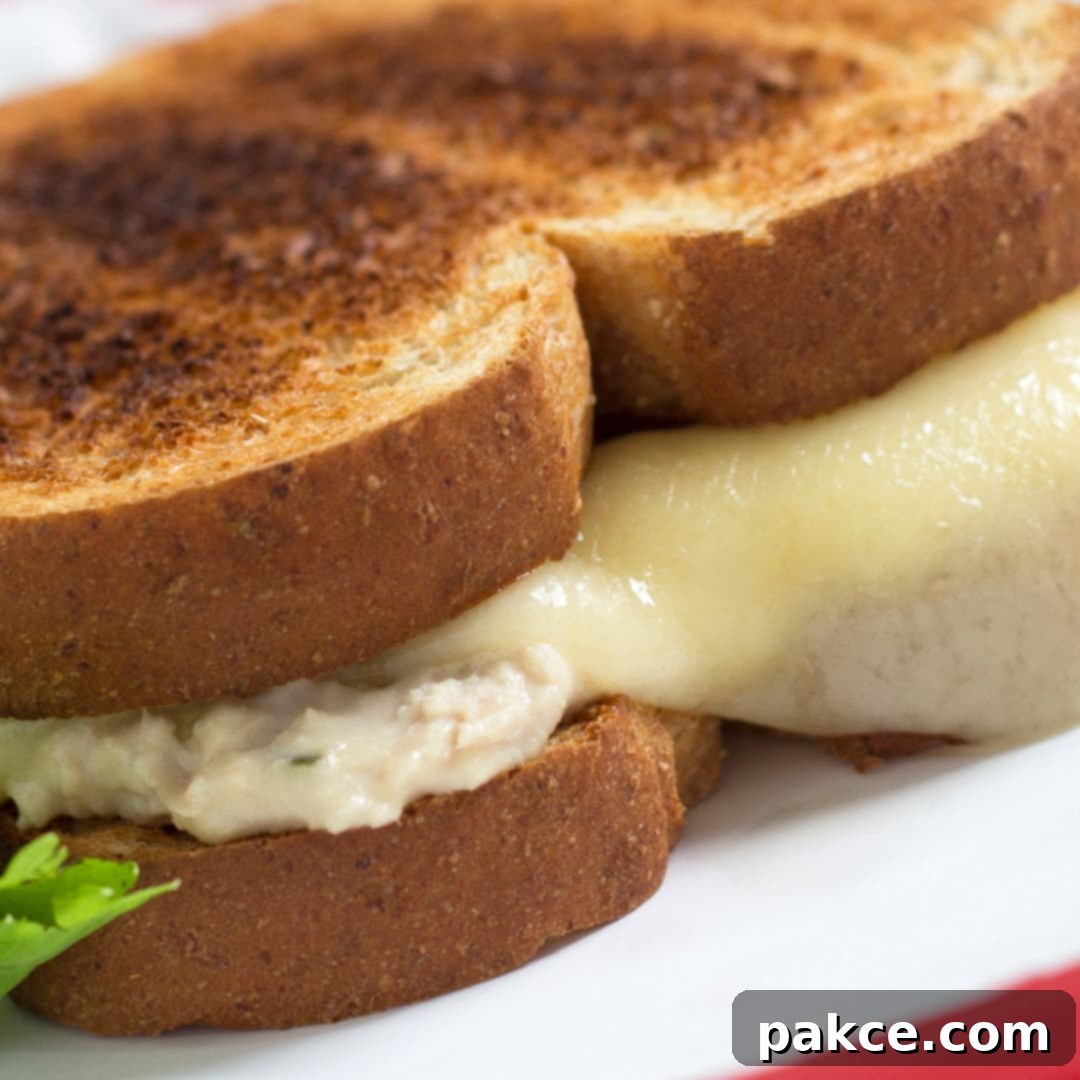
Speedy & Delicious Tuna Cheese Melts: The Ultimate 10-Minute Comfort Food Recipe
There are some dishes that just embody comfort, simplicity, and speed, and the classic tuna cheese melt is undoubtedly one of them. In the hustle and bustle of daily life, finding a satisfying meal that doesn’t demand hours in the kitchen can feel like a rare luxury. That’s where this recipe shines! Whether you’re rushing to get dinner on the table after a long day, preparing a quick lunch, or simply craving a warm, gooey, satisfying bite, these easy tuna melts deliver every time.
What makes them even better? If you have a trusty toaster oven, you can whip up this delightful meal without even heating up your main oven. This not only saves energy but also makes the process incredibly efficient for individual servings or small batches. Get ready to discover your new favorite quick dinner solution, packed with savory tuna, tangy relish, creamy mayonnaise, and gloriously melted cheese, all nestled between slices of perfectly toasted bread. It’s a culinary hug that’s ready in a flash!

Why Tuna Cheese Melts Are Your Go-To Weeknight Meal
The humble tuna cheese melt holds a special place in the hearts of many, and for good reason. It’s more than just a sandwich; it’s a beacon of culinary convenience and taste, especially when time is of the essence. Here’s why this recipe should be a staple in your weeknight rotation:
- Unbeatable Speed: With just 5 minutes of prep and 5 minutes of cook time, you can have a hot, delicious meal on the table in literally 10 minutes. This makes it faster than most fast-food options and certainly more satisfying.
- Simple, Accessible Ingredients: You won’t need a trip to a specialty store for these. Canned tuna, bread, cheese, mayonnaise, and a few common pantry staples are all it takes. These are items many households keep on hand, ensuring a last-minute meal is always possible.
- Economical and Budget-Friendly: Tuna is an affordable protein source, and the other ingredients are equally cost-effective. This recipe is perfect for feeding a family without straining your budget, proving that delicious doesn’t have to mean expensive.
- Highly Customizable: While the basic recipe for tuna cheese melts is fantastic on its own, it’s also an excellent foundation for creativity. You can easily adapt it to suit different tastes, dietary needs, or whatever ingredients you happen to have available.
- Kid-Friendly Comfort Food: A warm, cheesy, and savory sandwich is almost always a surefire hit with kids. It’s a comforting meal that evokes nostalgia and often gets a thumbs-up from even the pickiest eaters, making dinner time a little less stressful for parents.
- Minimal Cleanup: With minimal cooking steps and often just one bowl for mixing, cleanup is a breeze, adding to its appeal as a stress-free dinner option.
The Ultimate Tuna Cheese Melts Recipe
Ready to create this iconic comfort food? Here’s the straightforward recipe that promises maximum flavor with minimum fuss. This recipe serves 4 hungry individuals or provides enough for two delicious meals.

Tuna Cheese Melts
Mary Ann
5
5
10
Main Dish
American
4 sandwiches
507
Ingredients
- 10 oz canned white tuna, chunked and well-drained
- 1 tablespoon onions, finely chopped (red or white onion)
- ½ cup mayonnaise (or light mayo/Greek yogurt for a lighter option)
- 1 ½ tablespoon pickle relish (sweet or dill, to your preference)
- 8 slices whole grain bread, toasted (sourdough or rye also work wonderfully)
- 4 slices Swiss cheese (or cheddar, provolone, or your favorite melting cheese)
Instructions
-
Step 1: Preheat & Toast. Preheat your broiler to high. While it’s heating, toast the 8 slices of bread to your desired level of golden crispness. Place the toasted bread on a baking sheet or any broiler-safe plate and set aside.
-
Step 2: Prepare the Tuna Mixture. In a medium bowl, combine the thoroughly drained and chunked white tuna, finely chopped onion, creamy mayonnaise, and tangy pickle relish. Use a fork to mix all the ingredients well until they are evenly combined and the tuna is coated. Take care not to over-mash the tuna; a slightly chunky texture is preferable. Divide the tuna mixture evenly among 4 of the toasted bread slices.
-
Step 3: Melt the Cheese. Place one slice of Swiss cheese (or your chosen cheese) directly on top of each portion of tuna mixture on the bread. Transfer the baking sheet with the open-faced sandwiches back to the preheated broiler. Broil for approximately 1-2 minutes, or until the cheese is beautifully melted, bubbly, and just beginning to achieve a light golden-brown color at the edges. It’s crucial to watch the sandwiches continuously during this step, as broilers can quickly burn food.
-
Step 4: Assemble & Serve. Carefully remove the baking sheet from the broiler. Top each cheesy tuna half with a plain toasted bread slice to complete the sandwich. Serve your delicious tuna cheese melts immediately while the cheese is still warm and gooey. Enjoy!
Notes
Nutrition per serving
Carbohydrates: 29 g
Protein: 28 g
Fat: 31 g
Sodium: 803 mg
Fiber: 2 g
Sugar: 3 g
Net Carbohydrates: 26 g
Share on Facebook
Pin Recipe
Mastering Your Tuna Salad: An Ingredient Spotlight
While the recipe above provides the perfect foundation, a deeper understanding of each ingredient allows for optimal flavor and texture, and opens the door to endless delicious variations. Let’s break down the key components:
- Canned White Tuna (Chunked and Drained): For a truly classic tuna melt, white tuna (such as albacore) is often preferred for its mild flavor and firm, substantial texture. Chunked tuna provides a more satisfying bite compared to flaked. Most importantly, ensure it is thoroughly drained. Excess moisture can make your tuna salad soggy and compromise the integrity of your sandwich. If you lean towards a richer, more robust flavor, tuna packed in olive oil can be used, but be extra diligent with draining and consider adjusting your mayonnaise quantity accordingly.
- Onions (Finely Chopped): A small amount of finely chopped onion adds a crucial element: a fresh, zesty crunch and a subtle, piquant bite that beautifully complements the richness of the tuna. For a milder flavor, especially if serving to sensitive palates, consider using green onions (scallions) or finely minced shallots. To further reduce the pungency of red or yellow onions, you can soak them in cold water for about 10 minutes before draining and adding to the mix.
- Mayonnaise: This is the creamy binding agent that brings all the elements of the tuna salad together, contributing moisture, richness, and a smooth texture. Use your favorite brand, or for an elevated taste, try a homemade mayonnaise. For those looking to lighten the meal, reduced-fat mayonnaise or a blend of mayonnaise and Greek yogurt can be excellent alternatives, with Greek yogurt adding a pleasant tang and a boost of protein.
- Pickle Relish: The sweet and tangy notes of pickle relish are essential to a classic tuna salad, providing a bright counterpoint that cuts through the richness of the mayonnaise and tuna. Whether you prefer sweet or dill relish, its finely chopped texture integrates seamlessly into the salad. If you don’t have relish on hand, finely diced pickles (gherkins or cornichons, depending on your preferred level of tanginess) make an excellent substitute.
- Whole Grain Bread (Toasted): Toasting the bread is a non-negotiable step for a perfect tuna melt. It creates a sturdy barrier that prevents the bread from becoming soggy under the tuna mixture and melted cheese, while also adding a delightful textural contrast. While whole grain bread offers a healthy and hearty foundation, don’t hesitate to experiment with other varieties like tangy sourdough, earthy rye, or even a thick-sliced brioche for different flavor profiles.
- Swiss Cheese: Swiss cheese is a fantastic choice for tuna melts because it melts beautifully, creating that desirable gooey texture, and offers a distinct nutty and slightly sweet flavor that harmonizes wonderfully with tuna. However, this is one of the easiest components to personalize! Cheddar for a sharper taste, provolone or mozzarella for a milder, extra-stretchy melt, or even Monterey Jack (plain or pepper jack for a kick) are all excellent alternatives.
Top Tips for Crafting the Perfect Tuna Cheese Melt Every Time
While making a tuna melt is inherently simple, a few expert tips can elevate your sandwich from good to absolutely glorious. Follow these guidelines for consistent perfection:
- Drain Your Tuna Thoroughly: This is arguably the most critical step. Excess water or oil will result in a watery, greasy, and ultimately soggy tuna salad, which is the nemesis of a great melt. Press down on the tuna in a sieve or use the can lid to squeeze out as much liquid as possible.
- Don’t Overmix the Tuna: While you want all the ingredients in your tuna salad to be well combined, avoid mashing the tuna into a paste. Leaving some small chunks of tuna ensures a better, more satisfying texture in every bite. Gentle folding is key.
- Toast Your Bread Adequately: A properly toasted slice of bread provides the necessary structural integrity to hold the generous tuna filling and melted cheese without succumbing to sogginess. It also adds a delightful crunch that contrasts with the creamy filling. Don’t under-toast!
- Always Watch the Broiler Closely: Broilers are incredibly powerful and can quickly turn perfection into char. Stay by your oven or toaster oven and keep a constant eye on your tuna melts. Cheese can go from perfectly bubbly and golden to burnt in a matter of seconds.
- Season to Your Taste: The provided recipe is a fantastic starting point, but don’t be afraid to adjust seasonings. A pinch of salt and freshly ground black pepper can enhance flavors. A dash of hot sauce, a squeeze of lemon juice, or a sprinkle of dried dill can also elevate the taste profile significantly.
- Utilize a Toaster Oven for Optimal Convenience: As highlighted earlier, a toaster oven is a game-changer for tuna melts. It heats up much faster than a conventional oven, uses less energy, and provides excellent broiling capabilities for that perfectly melted, slightly golden cheese. It’s ideal for making one or two melts without heating up your entire kitchen.
Delicious Variations & Customizations for Your Tuna Melt
The beauty of the tuna melt lies not just in its simplicity but also in its incredible adaptability. Once you master the basic recipe, the possibilities for customization are endless. Don’t be afraid to experiment and make these melts uniquely yours!
Explore Different Cheese Choices:
- Sharp Cheddar: For a more robust, tangy flavor that stands out.
- Provolone or Mozzarella: Offers a milder taste with an impressive, stringy melt factor.
- Colby Jack or Monterey Jack: Provides a creamy, slightly buttery flavor; use pepper jack for a subtle spicy kick.
- Smoked Gouda: Adds a sophisticated smoky depth that pairs surprisingly well with tuna.
- Feta or Goat Cheese (crumbled): For an open-faced melt, these can add a tangy, salty, or creamy element post-broiling.
Elevate with Flavorful Add-Ins to Your Tuna Salad:
- Crunchy Vegetables: Finely diced celery, red bell peppers, or shredded carrots add an extra layer of crunch, color, and nutrition.
- Briny Bites: Capers or finely chopped olives can introduce a wonderful salty, briny punch.
- Fresh Herbs: Incorporate finely chopped fresh dill, parsley, chives, or even a touch of cilantro to brighten the flavor profile.
- Aromatic Spices: A pinch of paprika (smoked or sweet), garlic powder, a dash of Old Bay seasoning, or a tiny bit of curry powder can add unexpected depth and complexity.
- Heat Seekers: For those who enjoy a bit of spice, mix in a small amount of sriracha, a pinch of red pepper flakes, or finely diced jalapeños (fresh or pickled) into your tuna salad.
- Creamy Additions: Diced hard-boiled egg can add another layer of protein and creaminess, reminiscent of classic egg salad.
- Tangy Boost: A squeeze of fresh lemon juice or a dash of apple cider vinegar can cut through the richness and brighten the overall taste.
Experiment with Different Bread Types:
- Sourdough: Its characteristic tangy flavor is a truly wonderful complement to the richness of tuna and cheese.
- Rye Bread: Offers a distinct, savory profile that pairs beautifully with the classic tuna salad flavors.
- Brioche or Challah: For a richer, slightly sweeter, and more indulgent sandwich experience.
- English Muffins or Bagel Halves: Create a heartier, often open-faced version that is great for breakfast or brunch.
- Ciabatta or Focaccia: These sturdy, flavorful breads can hold up well to the filling and provide a great texture.
Consider serving your tuna melt as an open-faced sandwich for a slightly lighter meal, or load it up with extra cheese and toppings for ultimate indulgence. The adaptability of this recipe ensures it never gets boring!
What to Serve with Your Perfect Tuna Melts
A tuna cheese melt is wonderfully satisfying on its own, but pairing it with a thoughtfully chosen side can elevate it into a complete and truly delightful meal. Here are some classic and creative suggestions to round out your plate:
- Tomato Soup: This is arguably the most iconic and beloved pairing for a grilled cheese or tuna melt. The warm, tangy acidity of tomato soup is the perfect counterpoint to the rich, savory flavors of the sandwich. A creamy tomato bisque or a hearty chunky tomato soup both work beautifully.
- Fresh Green Salad: A light, crisp green salad dressed with a simple vinaigrette offers a refreshing contrast to the richness of the tuna melt. It adds a welcome burst of freshness and a healthy component to the meal.
- Creamy Coleslaw: The cool, creamy crunch of coleslaw, with its tangy dressing, provides a lovely textural and flavor complement. It’s a classic deli side that feels right at home next to a tuna melt.
- Crispy Potato Chips or French Fries: For a truly classic, comforting diner-style experience, a side of perfectly salted potato chips or golden French fries is always a winner. It’s a simple pleasure that enhances the casual appeal of the meal.
- Dill Pickles: A spear or two of dill pickle on the side adds a fantastic burst of briny, tangy flavor that cuts through the richness and cleanses the palate, preparing you for the next delicious bite.
- Fresh Fruit Salad: For a lighter, healthier accompaniment, a bowl of seasonal fresh fruit can add a sweet and vibrant element, offering a refreshing contrast.
- Vegetable Sticks with Dip: Crunchy vegetable sticks like carrot, celery, cucumber, and bell pepper strips, served with a ranch or hummus dip, offer a healthy and satisfying crunch.
- Roasted Vegetables: Simple roasted broccoli, asparagus, or cherry tomatoes can add warmth and nutrition without overpowering the main dish.
Storage and Reheating Instructions for Tuna Melts
While tuna cheese melts are undeniably at their best when served immediately, hot off the broiler or toaster oven, there are smart ways to handle components or potential leftovers. Planning ahead can make future meals even quicker!
- Storing Tuna Salad: The prepared tuna salad mixture is excellent for making ahead. Store it in an airtight container in the refrigerator for up to 3-4 days. This allows you to quickly assemble fresh melts whenever a craving strikes, significantly cutting down on prep time during busy moments. Always ensure it’s kept cold to maintain freshness and safety.
- Storing Assembled Melts: It is generally not recommended to store fully assembled tuna cheese melts. The bread tends to become soggy from the tuna salad, and the cheese will lose its desirable melted texture, hardening and becoming less appealing. For the best culinary experience, always assemble and broil your melts just before you plan to serve them.
- Reheating Leftovers (if absolutely necessary): If you do find yourself with a leftover assembled melt and don’t want to waste it, the best method for reheating is in a toaster oven or a dry non-stick pan over medium-low heat. This allows the bread to crisp up again and the cheese to remelt gently. Avoid microwaving, as this method will almost certainly result in soggy bread and a rubbery cheese texture. Heat until warmed through and the cheese is bubbly again.
Frequently Asked Questions About Tuna Cheese Melts
Got questions about making the perfect tuna cheese melt? We’ve got answers to some of the most common queries:
- Q: Can I use tuna packed in oil instead of water?
- A: Absolutely! While tuna packed in water is often preferred for a lighter profile, tuna in oil can offer a richer flavor. If using oil-packed tuna, be sure to drain it exceptionally well to prevent an overly oily tuna salad. You might also find you need to adjust the amount of mayonnaise slightly, as the tuna itself will be more moist.
- Q: What if I don’t have a broiler or toaster oven? How can I still make a tuna melt?
- A: No problem at all! You have a couple of great alternatives:
- Stovetop Method: Assemble the tuna melts (tuna mixture between two slices of toasted bread, with cheese either on top of the tuna or melted inside the sandwich). Heat a non-stick pan over medium heat with a little butter or oil. Grill the sandwich until both sides are golden brown and the cheese is beautifully melted, flipping once. You might need to cover the pan briefly to help the cheese melt.
- Conventional Oven Method: Toast your bread, then assemble the open-faced sandwiches with the tuna mixture and cheese on top. Bake them in a preheated conventional oven at 375°F (190°C) for about 5-7 minutes, or until the cheese is melted and bubbly.
- Q: Can I prepare the tuna salad mixture ahead of time?
- A: Yes, absolutely! Preparing the tuna salad in advance is a fantastic time-saver. Simply mix all the ingredients (tuna, onion, mayonnaise, relish) and store it in an airtight container in the refrigerator for up to 3-4 days. When you’re ready to eat, just toast your bread, assemble, and broil!
- Q: Is this tuna melt recipe considered healthy?
- A: Tuna itself is an excellent source of lean protein and beneficial omega-3 fatty acids. While mayonnaise and cheese contribute to the fat and calorie content, you can easily make this recipe healthier. Options include using light mayonnaise, reduced-fat cheese, or substituting some of the mayonnaise with Greek yogurt for a protein boost and tang. Using whole grain bread also adds valuable fiber. The nutrition information provided is a guideline, based on tuna packed in water, and can vary significantly with ingredient choices.
- Q: Can I add other vegetables to the tuna mixture for extra nutrition and crunch?
- A: Definitely! Tuna salad is incredibly versatile. Finely diced celery, red or green bell peppers, shredded carrots, or even a handful of frozen peas or corn (thawed) can add extra flavor, essential vitamins, and a delightful crunch to your tuna salad, boosting its nutritional value and appeal.
Pin this recipe for later inspiration!

Conclusion: A Simple Joy for Any Meal
From its humble beginnings to its revered status as a beloved comfort food, the tuna cheese melt remains a timeless classic that continues to deliver satisfaction. Its straightforward preparation, minimal ingredient list, and incredible versatility make it a true champion for busy weeknights, quick and hearty lunches, or simply whenever you need a warm, fulfilling hug in sandwich form. It’s a testament to how simple ingredients, thoughtfully combined, can create something truly extraordinary.
So, the next time you find yourself short on time but big on hunger, remember this speedy, delicious, and endlessly customizable recipe. Grab your canned tuna, toast your favorite bread, layer on that savory mix, melt that cheese to golden perfection, and savor the simple joy of a homemade tuna cheese melt. It’s more than just food; it’s a moment of effortless culinary delight!
