DIY Chalkboard Paint Jars: Transform Your Pantry into a Stylish & Organized Space
Are you tired of rummaging through your pantry, struggling to identify what’s in each container? Do you dream of a kitchen where functionality meets beautiful home decor? This easy DIY chalkboard paint project offers the perfect solution, turning ordinary pantry items into stunning, easily identifiable displays. Imagine your pasta, beans, baking supplies, and more, neatly stored in uniform glass jars, each sporting a customizable, erasable label. It’s a simple yet incredibly effective way to elevate your kitchen’s aesthetic while bringing order to your daily routine, making your food storage both practical and perfectly picturesque.
For many, the joy of organization is a powerful motivator. I confess, I’m one of those people. While my desk might occasionally resemble a paper hurricane, nearly everything else in my home brings me immense satisfaction when neatly arranged. The sight of well-designed containers, clever storage solutions, or even a perfectly packed tote bag fills me with delight. Visiting stores like Ikea often triggers a happy heart palpitation – a testament to my love for all things organized and efficient. It’s this passion that often leads to creative solutions for common household challenges, and pantry organization is certainly one of the most rewarding transformations you can undertake.

The Foundation: Practical and Pretty Glass Jars for Optimal Food Storage
A few years ago, I stumbled upon a treasure trove of beautiful quart and half-gallon glass jars at a local Dollar General. Priced incredibly affordably at $1.50 and $2 each, I quickly stocked up on a significant quantity. These jars have since become indispensable in my kitchen, serving as perfect containers for rice, dried beans, various types of pasta, and a myriad of other pantry staples. The beauty of these glass jars lies in their dual functionality: they are both aesthetically pleasing, creating a uniform and tidy look, and incredibly practical for long-term food storage.
Beyond their visual appeal, these jars dramatically free up valuable pantry space. Instead of bulky, irregularly shaped bags and boxes creating a cluttered mess, uniform glass containers bring a sense of order and calm. This organized approach isn’t just about looks; it’s about efficiency and protection. When we resided in a more rural setting, these airtight containers were an absolute necessity for keeping out unwelcome guests, particularly mice, who are notoriously quick at infiltrating food stored in flimsy packaging. Even in urban environments, glass jars offer superior protection against pests and help maintain food freshness by providing an airtight seal. They keep moisture out and flavors in, ensuring your bulk purchases stay as good as new for longer, a benefit that goes far beyond mere aesthetics.
The Challenge: Identifying Contents at a Glance in Your Organized Pantry
While the clear glass allowed me to see the contents, a new challenge emerged over time. As my collection of various grains, beans, and flours grew, distinguishing between similar-looking items became increasingly difficult. Is this jasmine rice or basmati rice? Are these lentils or split peas? What kind of flour is this? Without pulling each jar out for a close examination, it was often a guessing game. This minor inconvenience, though small, began to disrupt the very organization I cherished. It became clear that a clear, visible, and easily changeable labeling system was essential to truly maximize the efficiency and beauty of my glass jar food storage.
The Solution: Embracing the Magic of DIY Chalkboard Paint on Glass
My mind immediately turned to chalkboard paint. I had used it years ago to create a fun, interactive chalkboard wall in my girls’ room, and its versatility always impressed me. The big question was: would it adhere effectively to glass, creating durable and functional labels? A quick search on Pinterest, brimming with creative DIY ideas, confirmed my suspicions – it absolutely would! This discovery was the catalyst for transforming my functional jars into truly customized, chic pantry staples. Chalkboard paint offers the unique advantage of erasable labels, meaning you can change the contents of your jars, update expiry dates, or refresh cooking instructions without needing to replace or re-label them permanently. It’s an adaptable solution for an evolving pantry.
Step-by-Step Guide: Creating Your Own Chalkboard Labeled Jars for Pantry Organization
The process of applying chalkboard paint to glass jars is surprisingly straightforward, requiring minimal active work time. However, patience is key, as adequate drying time between coats is crucial for a durable and professional finish. I typically set up my painting station on my kitchen table, allowing me to work in stages throughout the day and make the most of the drying intervals.
Materials You’ll Need for this DIY Project:
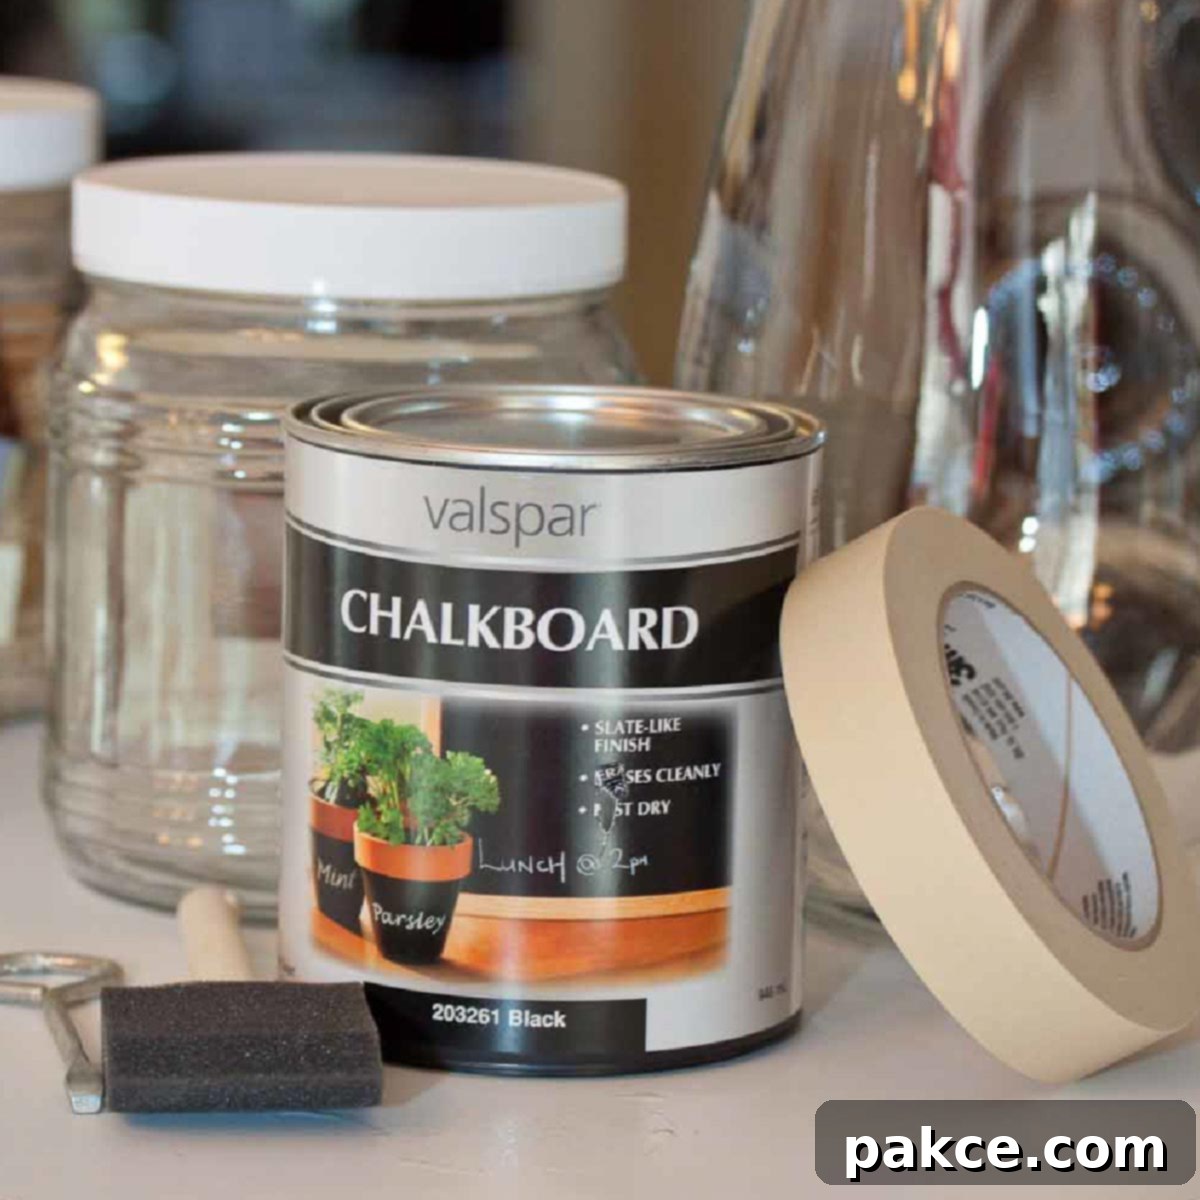
- Clean, dry glass jars (various sizes, such as mason jars or repurposed food jars)
- Chalkboard paint (available at most craft or hardware stores in spray or brush-on forms)
- Painter’s masking tape (for crisp lines) or a steady hand (for freehand shapes)
- Small foam brush or good quality synthetic brush (if using brush-on paint)
- Rubbing alcohol or glass cleaner and paper towels for initial cleaning
- Drop cloth, old newspapers, or cardboard to protect your workspace
- Chalk markers (highly recommended for vibrant, clean labels!) or regular chalk
Preparation is Key for a Flawless Finish:
- Clean Your Jars Thoroughly: Start by thoroughly washing and drying all your glass jars. Any grease, dust, or residue can prevent the chalkboard paint from adhering properly. For an extra clean surface, give them a quick wipe down with rubbing alcohol and let them air dry completely.
- Protect Your Workspace: Lay down a drop cloth, old newspapers, or a large piece of cardboard on your kitchen table or desired painting area. This will catch any drips or spills and make cleanup much easier. Good ventilation is also a plus when working with paint.
Applying the Paint to Create Your Custom Labels:
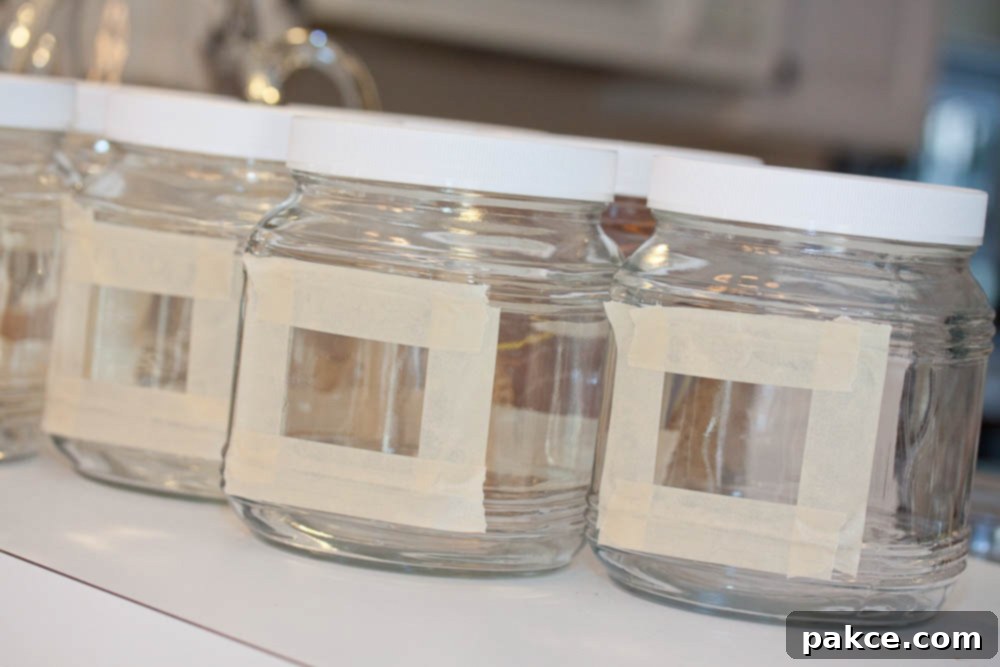
- Masking (Optional but Recommended for Beginners): For neat, uniform labels with crisp edges, carefully apply painter’s masking tape to create the desired label shape on each jar. A simple rectangle, square, or even an oval works well. Press down firmly on the tape edges to prevent paint bleed. For those feeling more adventurous, or if you prefer a rustic, hand-painted look, you can skip the tape and paint freehand. I confess, in later projects, I often opted for a free-hand rectangle, which saved a good deal of time and still looked charming and perfectly imperfect.
- First Coat of Paint: Using a foam brush or a small synthetic brush (if using brush-on paint), apply a thin, even coat of chalkboard paint within your taped-off area (or freehand). Avoid applying it too thickly, as this can lead to drips, uneven texture, and significantly longer drying times. Thin coats build up better opacity and durability.
- Drying Time Between Coats: Allow the first coat to dry completely to the touch. This usually takes 1-2 hours, but always check your paint’s specific instructions and consider local humidity. Resist the urge to rush this step! I often use this interim time to tackle other household tasks or enjoy a cup of coffee.
- Subsequent Coats: Once the first coat is dry, apply a second thin coat. For optimal opacity and a truly durable chalkboard surface that can withstand frequent use, I found that three coats were ideal. Repeat the drying process between each coat. The active painting for 15-20 jars and a couple of pitchers took about 30 minutes for initial taping, and then roughly 15 minutes for each subsequent paint coat. The waiting time in between adds up, but the active work is quite manageable, making this a great project to spread over a day.
- Final Cure for Durability: After applying the final coat, let the paint dry for several hours before gently removing the masking tape. Once the tape is off, allow the paint to cure completely overnight, or ideally, for 24-48 hours, before attempting to write on the labels. This ensures the paint is fully hardened and ready for use, preventing accidental scratching or damage to your newly created chalkboard surface.

Labeling Your New Chalkboard Jars: The Magic of Chalk Markers
Once your chalkboard paint is fully cured, it’s time for the fun part: labeling! While traditional chalk works perfectly well, I recently discovered the wonders of chalkboard markers, and I honestly don’t think I’ll ever go back to regular chalk. These markers offer a cleaner, bolder look, writing just like regular markers but drying with that characteristic matte, chalk-like finish you often see in trendy coffee shops and grocery store displays. They’re less dusty, provide a much more professional appearance, and make your pantry truly Instagram-worthy. Plus, they come in a variety of colors, allowing for even more customization.
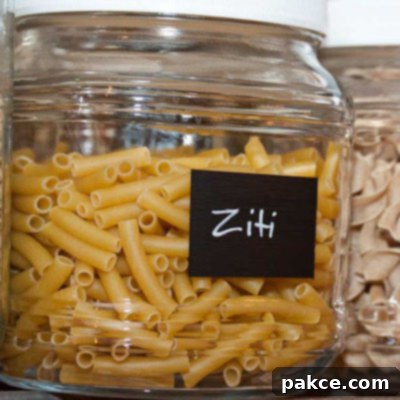
The versatility of these labels extends far beyond simply naming the contents. Of course, “Rice” or “Lentils” is a great start, but why stop there? For grains like rice, I often jot down the ideal cooking time and the rice-to-water proportion directly on the label. This eliminates the need to constantly consult recipes or packaging, streamlining your meal preparation. You could also include the purchase date, expiration date, or even quick recipe tips for the ingredients, making your pantry not just organized, but also a mini culinary reference library. For baking supplies, you might add notes on whether it’s self-rising or all-purpose flour. The possibilities are endless, and the ability to easily erase and rewrite means your labels can evolve with your cooking habits.

Benefits of an Organized Pantry with Chalkboard Jars
Implementing this DIY chalkboard paint project for your pantry organization brings a multitude of advantages that extend beyond just a pretty facade. It’s an investment in a more harmonious and efficient kitchen:
- Enhanced Aesthetics: Transform a cluttered, uninspiring pantry into a visually appealing, cohesive space. The uniform jars with classic black labels create a charming, rustic yet modern look that can easily become a design feature in your kitchen, especially if you have open shelving.
- Effortless Identification & Time-Saving: No more squinting or guessing! Clearly labeled jars mean you can find exactly what you need at a glance, saving precious minutes during meal preparation and reducing kitchen stress. You’ll know instantly if you’re running low on an ingredient, simplifying your grocery list.
- Optimal Food Freshness & Pest Control: Airtight glass jars are superior for preserving the freshness of dry goods, protecting them from moisture, air, and odors. Crucially, they act as a strong barrier against pantry pests like weevils or moths, which can easily infiltrate flimsy bags and boxes. This is especially vital for bulk food storage.
- Reduced Food Waste: When you can clearly see what you have and how much is left, you’re far less likely to buy duplicates or let ingredients expire unnoticed at the back of a cabinet. This promotes a more mindful and economical approach to grocery shopping and cooking, saving you money in the long run.
- Flexible & Adaptable Storage: The erasable nature of chalkboard labels is a game-changer. Change your pantry items, update cooking notes, or simply refresh your handwriting – it’s all possible with a damp cloth and a new message. This adaptability makes them perfect for seasonal ingredients or changes in dietary preferences.
- Space Efficiency: Decanting items from irregular-sized bags and boxes into uniform jars often allows for more efficient stacking and utilization of shelf space. This can magically make a small pantry feel much larger and more functional.
- Sustainable Living: Reusing glass jars repeatedly for your bulk purchases reduces waste from disposable packaging and supports a more eco-friendly, zero-waste lifestyle. It’s a small change with a significant positive impact.
- Personalized Touch: This DIY project allows you to infuse your personality into your kitchen decor. Whether you choose elegant script, playful doodles, or simple block letters, your pantry will reflect your unique style.
Beyond the Pantry: Creative Uses for Chalkboard Paint Around Your Home
Chalkboard paint isn’t just for pantry jars; its versatility makes it a fantastic tool for countless DIY projects around the home. It invites creativity and organization into almost any space. Here are some inspiring ideas, including those that sparked my own creativity, to get you thinking about where else you can embrace this wonderful medium:
- Write-on Wine Glasses: Perfect for parties! Guests can label their own glass directly on the stem or base, preventing mix-ups and adding a fun, personalized touch to any gathering.
- Globe Message “Board”: Turn an old, perhaps outdated, globe into an interactive piece of decor. You can jot down travel dreams, bucket list destinations, daily affirmations, or even a rotating quote. A truly unique and educational conversation starter.
- Entryway Message Center: Create a command center by painting a section of a wall or a board near your door. Ideal for leaving notes, reminders for family members, grocery lists, or a sweet welcome message. I adore this idea and only wish I had the perfect spot for it in my own home!
- Chalkboard Easel from an Old Crib: Upcycle a discarded crib rail or side into a delightful, child-friendly art station. It provides endless hours of creative play without consuming paper, making it both eco-friendly and fun.
- Chalkboard Frames: Transform old picture frames by painting the glass or the matting. Use them for changeable art, daily quotes, weekly menus, or to highlight special announcements in a stylish way.
- Chalkboard Placemats: A fun and interactive addition to any dinner table. Kids can doodle while they wait for food, or you can write personalized messages, menu items, or even little games for guests. They wipe clean for the next meal!
- Chalkboard Table Runner for Labeling a Buffet: Perfect for entertaining! Easily label dishes, drinks, or serving suggestions at a buffet or dessert bar, adding a sophisticated and organized touch to your hospitality.
- Herb Garden Labels: Paint small wooden stakes, rocks, or even old spoons with chalkboard paint to create charming, erasable labels for your herbs and plants in the garden or on a windowsill.
- Spice Jar Lids: For smaller jars in your spice rack, paint just the lids (or a small portion of them) for quick identification of spices, ensuring you grab the right one every time.
- Kids’ Activity Tabletop: Paint a section of an old, sturdy table or a play table’s surface for a dedicated drawing and learning space for children. It’s an instant, large canvas that fosters creativity.
- Door or Cabinet Panels: Paint a door panel or the inside of a cabinet door in your kitchen or laundry room to create a discreet message board or a place to jot down important reminders.
Conclusion: Organize, Decorate, and Simplify with Chalkboard Paint
This simple DIY chalkboard paint project is more than just a craft; it’s an investment in a more organized, efficient, and beautiful home. By transforming everyday pantry jars into stylish, labeled containers, you’re not only decluttering your kitchen but also adding a touch of personalized charm that reflects your own unique style. The ease of the project, combined with the immense benefits of clear visibility, enhanced food preservation, and flexible labeling, makes it an ideal weekend activity for anyone looking to simplify their routine and enhance their living space. It’s an approachable project that yields impressive, long-lasting results.
Ready to bring this magic into your own home? Gather your supplies, clear your schedule for a bit of creative fun, and get ready to enjoy a pantry that is as functional as it is fashionable. Have you tried a similar chalkboard paint project, or do you have other clever ideas for using this versatile medium? We’d love to hear about your experiences and inspire others in the comments below! Share your tips, tricks, and finished projects!
